manual for canon rebel t3i
The Canon Rebel T3i, released in 2011 as the EOS 600D or Kiss X5, is a popular entry-level DSLR offering professional-grade manual controls․ Its comprehensive manual and tutorials help photographers of all levels create stunning images effortlessly․
1․1 Overview of the Canon Rebel T3i
The Canon Rebel T3i, released in February 2011, is an entry-level DSLR known for its 18MP CMOS sensor and vari-angle LCD screen․ It offers professional-grade manual controls, making it ideal for beginners and enthusiasts alike․ Available as the EOS 600D in some regions, this camera is celebrated for its versatility and ease of use, providing excellent image quality and HD video recording capabilities․
1․2 Key Features of the Camera
The Canon Rebel T3i features an 18MP CMOS sensor, vari-angle LCD screen, and HD video recording capabilities․ It includes manual modes for precise control, a built-in flash, and compatibility with various lenses․ The optional 18-135mm kit lens enhances versatility․ The camera also supports RAW format shooting and offers advanced autofocus settings, making it a versatile tool for both still photography and video recording․
1․3 Importance of the Manual for Beginners
The manual is essential for beginners to unlock the full potential of the Canon Rebel T3i․ It provides clear guidance on operating modes, custom settings, and advanced features like manual focus and RAW shooting․ Step-by-step tutorials and troubleshooting tips help users overcome common challenges, ensuring they can confidently capture high-quality images and videos․ The comprehensive guide simplifies complex functions, making it an indispensable resource for mastering the camera․

Unboxing and First Impressions
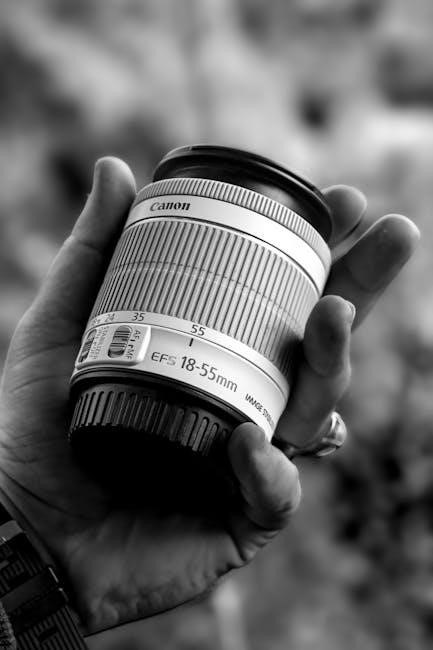
The Canon Rebel T3i comes with the camera body, EF-S 18-55mm lens, battery, charger, and manual․ First impressions highlight its sturdy build and intuitive design, perfect for beginners;
2․1 What’s Included in the Box
The Canon Rebel T3i box includes the camera body, EF-S 18-55mm lens, LP-E8 battery, LC-E8 charger, interface cable, neck strap, and user manual․ Additional items like a USB cable, lens cap, and optional EF-S 55-250mm lens may also be provided․ The packaging ensures all essentials for starting photography are included, making it a comprehensive kit for beginners․
2․2 Initial Setup and Battery Charging
Insert the LP-E8 battery into the charger and plug it into a power source․ Allow it to charge fully, which typically takes about 2 hours․ Avoid using the camera while charging․ Once charged, insert the battery into the camera․ Mount the lens securely, insert a memory card, and power on the camera․ Follow the on-screen prompts to set the language, date, and time․ Review the manual for detailed setup guidance․
2․3 First Look at the Camera Layout
Familiarize yourself with the Canon Rebel T3i’s layout․ The mode dial on top offers various shooting modes like Auto, P, Tv, Av, M, and Scene modes․ Locate the shutter button, aperture control, and zoom ring on the lens․ The vari-angle LCD screen allows flexible composition․ Note the optical viewfinder for precise framing․ Identify the pop-up flash, hot shoe, and memory card slot for essential functionality․

Understanding the Camera Layout
The Canon Rebel T3i features an ergonomic design with intuitive controls, including the mode dial, LCD screen, and menu system, ensuring easy navigation for photographers․
3․1 External Controls and Buttons
The Canon Rebel T3i features a range of external controls designed for easy access and intuitive operation․ The mode dial on top allows quick switching between shooting modes, while the shutter button and adjacent ISO/flash compensation buttons provide immediate access to essential functions․ The rear panel includes a multi-controller for menu navigation and quick access buttons for autofocus, white balance, and metering modes, streamlining workflow for photographers of all skill levels․
3․2 LCD Screen and Vari-Angle Feature
The Canon Rebel T3i features a 3-inch, 1․04-million-dot LCD screen with a vari-angle hinge, allowing flexible viewing angles․ This articulating screen is ideal for shooting at low or high angles, macro photography, or video recording․ The screen provides clear, vibrant previews and playback of images and videos․ The vari-angle design enhances creativity, enabling shots from unique perspectives without compromising comfort or control, making it a versatile tool for photographers and videographers alike․
3․3 Menu Navigation System
The Canon Rebel T3i features an intuitive menu navigation system, allowing users to easily access and adjust camera settings․ The menu is divided into tabs, including Shooting, Playback, Setup, and My Menu․ Users can navigate using the Quick Control Dial or Multi-controller․ Customizable options enable quick access to frequently used settings․ The menu is user-friendly, with clear labels and options, making it simple for beginners to explore and adjust camera functions efficiently․

Basic Camera Modes
The Canon Rebel T3i offers various shooting modes, including Auto, Program, Shutter Priority, Aperture Priority, Manual, and Scene modes, catering to different photography needs and skill levels․
4․1 Auto Mode for Beginners
Auto Mode simplifies photography by automatically adjusting settings like aperture, shutter speed, and ISO․ Ideal for newcomers, it allows you to focus on composition while the camera handles the rest․ The T3i’s intelligent system ensures well-balanced exposures, making it perfect for capturing quick snapshots without manual adjustments․ However, it offers limited creative control, making it a great starting point before exploring more advanced modes․
4․2 Program Mode (P)
Program Mode (P) offers a balance between simplicity and control, ideal for beginners transitioning from Auto Mode; The camera selects aperture and shutter speed, but users can adjust settings like ISO, exposure compensation, and flash․ This mode allows for creative input while maintaining ease of use, making it a great way to learn basic photography principles without full manual control․
4․3 Shutter Priority (Tv) and Aperture Priority (Av)
Shutter Priority (Tv) allows you to set the shutter speed, with the camera adjusting the aperture․ This mode is ideal for capturing motion, such as freezing fast-moving subjects or creating motion blur․ Aperture Priority (Av) lets you control the aperture, with the camera setting the shutter speed, perfect for managing depth of field․ Both modes offer flexibility, helping photographers learn how aperture and shutter speed interact while the camera handles the other parameter․
4․4 Manual Mode (M)
Manual Mode (M) gives full control over aperture, shutter speed, and ISO, allowing precise adjustments to achieve desired effects․ It’s ideal for experienced photographers who want creative freedom․ Use the aperture to control depth of field, shutter speed for motion effects, and ISO for low-light sensitivity․ This mode requires understanding exposure fundamentals but offers unparalleled flexibility for tailored results in various lighting conditions and artistic scenarios․
4․5 Scene Modes and Creative Filters
Scene Modes optimize camera settings for specific situations like portraits, landscapes, or sports․ Creative Filters apply artistic effects like Grainy B&W or Fisheye․ These modes simplify photography for beginners, offering tailored results without manual adjustments․ Use Scene Modes for consistent outcomes in common scenarios, and explore Creative Filters for unique, stylized images directly in-camera, enhancing creativity without post-processing;
Customizing Camera Settings
Customize settings to meet your preferences, from image quality to autofocus options․ Tailor settings for specific shooting styles, enhancing your photography experience and camera performance effectively․
5․1 Adjusting Image Quality and Resolution
Adjust image quality by selecting from RAW, JPEG, or a combination of both․ RAW captures maximum detail for post-processing, while JPEG offers convenience․ Choose resolution settings like Large, Medium, or Small to balance file size and quality․ Access these options via the camera’s menu system for optimal image capture tailored to your needs and storage preferences․
5․2 Setting Up ISO and White Balance
Set ISO between 100-6400 (expandable to 12800) to control light sensitivity; lower ISOs suit bright conditions, while higher ISOs handle low light but may add noise․ White Balance options include Auto, Daylight, Shade, Tungsten, Fluorescent, and Custom․ Adjust via the WB button or menu․ Use Auto for convenience or Custom for precise color accuracy․ Experiment to find the right balance for your shots․
5․3 Customizing Autofocus Settings
Customize autofocus settings to suit your subject․ Select from One-Shot AF for stationary subjects or AI Servo AF for moving ones․ Use the AF lock button to lock focus on a specific area․ Adjust AF point selection to Manual or Auto for better control․ Experiment with AF modes to capture sharp images․ The AF mode button allows quick switching․ Proper setup enhances focus accuracy and ensures clearer results in various shooting scenarios․
5․4 Using the Built-In Flash
The Canon Rebel T3i features a built-in flash for low-light situations․ Activate it via the flash button on the top․ Choose from modes like Auto, On, and Off․ Red-Eye Reduction helps minimize eye glare․ Use the flash exposure compensation to adjust brightness․ Experiment with bouncing the flash off surfaces for softer light․ Avoid using the flash in bright sunlight or beyond its range for optimal results and natural-looking images; Always check flash settings before shooting․

Advanced Shooting Techniques
Explore advanced methods like manual focus, burst mode, and bracketing for enhanced precision and creativity․ Master these techniques to capture stunning images in various lighting conditions effortlessly․
6․1 Using Manual Focus for Precision
Manual focus allows precise control over your subject’s sharpness, especially in challenging lighting or when autofocus struggles․ Enable manual focus using the switch on the lens․ Use the focus ring to adjust sharpness, guided by the electronic focus confirmation light or the magnify button for zoomed-in accuracy․ This technique is ideal for macro, portraits, or creative depth-of-field control, ensuring your vision is perfectly captured․
6․2 Understanding Burst Mode and Continuous Shooting
Burst mode, or continuous shooting, allows the T3i to capture multiple frames per second, ideal for dynamic subjects like sports or wildlife․ Access this mode via the Drive Mode button on the top panel․ With a fast memory card, the T3i can shoot up to 3․7 fps․ Use this feature to freeze action or capture sequential moments․ The camera buffer limits burst length, so plan shots and use a high-speed card for optimal performance․
6․3 Bracketing and HDR Photography
Bracketing involves capturing multiple shots at different exposures to merge into one image․ The T3i allows up to three frames with exposure differences of ±2 stops․ Enable Auto Exposure Bracketing (AEB) via the menu․ Use a tripod and self-timer for sharp results․ While the T3i doesn’t have built-in HDR, bracketed images can be combined using external software for stunning high-dynamic-range photos, perfect for landscapes or high-contrast scenes․
6․4 Shooting in RAW Format
Shooting in RAW format captures uncompressed image data, offering superior quality and flexibility․ The T3i saves RAW files as ․CR2, retaining maximum detail for post-processing․ Enable RAW in the menu under Image Quality․ While RAW files are larger, they allow better correction of exposure, color, and noise․ Use RAW for critical shots, but note it requires separate software like Canon’s DPP or Adobe Lightroom for editing․

Video Recording with the T3i
The Canon Rebel T3i supports HD video recording up to 1080p at 24, 25, or 30 fps․ It features manual exposure control, a vari-angle LCD, and an external microphone input for enhanced audio quality, making it ideal for creative and professional video projects․
7․1 Basics of HD Video Recording
The Canon Rebel T3i records HD video in 1080p at 24, 25, or 30 fps, and 720p at 50 or 60 fps․ Videos are saved in MOV format with H․264 compression․ The vari-angle LCD allows for flexible framing, while the external microphone input enhances audio quality․ Autofocus can be used during recording, and clips are limited to 4GB or 29:59 minutes; Stabilization and planning are key for smooth, professional-looking footage․
7․2 Customizing Video Settings
Customize video settings on the T3i by adjusting ISO (100-6400), white balance, and autofocus modes․ Enable manual exposure control for precise adjustments․ Picture Styles allow customization of contrast, saturation, and sharpness․ Use external microphones for better audio and enable wind filters to reduce noise․ Experiment with frame rates and resolution to achieve desired effects․ Plan shots and use manual focus for smoother transitions during recording․
7․3 Using Manual Exposure in Video Mode
Manual exposure in video mode offers precise control over ISO, aperture, and shutter speed․ Adjust settings to match lighting conditions or create artistic effects․ Enable manual mode via the camera menu․ Use the aperture and shutter buttons to fine-tune settings during recording․ This feature allows for consistent exposure and creative control, enhancing video quality and visual storytelling capabilities․
7․4 Tips for Smooth Video Recording
For smooth video recording, use a tripod to minimize camera shake․ Enable manual focus to avoid autofocus shifts․ Use continuous autofocus for dynamic subjects․ Choose the optimal frame rate for your content․ Record in manual mode for consistent exposure․ Clean the lens regularly for clear footage; These tips ensure professional-quality video with minimal distractions and improved visual clarity․
Post-Processing and Image Transfer
Organize your photos, edit using Canon’s software, and backup files regularly for safekeeping․ Enhance images and store them securely for future access and sharing․
8․1 Transferring Images to a Computer
Connect the Canon Rebel T3i to a computer using a USB cable or card reader․ Use the EOS Utility or your OS’s file transfer utility to import photos․ Organize images into folders for easy access․ Ensure the camera is in playback mode before connecting․ Transfer RAW, JPEG, or video files seamlessly․ Backup your files to an external drive for safe storage․
8․2 Using Canon’s Image Management Software
Canon’s EOS Utility and Digital Photo Professional (DPP) simplify image management․ EOS Utility transfers photos and videos to your computer, while DPP allows for advanced editing․ Adjust exposure, color balance, and sharpness with ease․ Batch process images for efficiency․ These tools help organize, enhance, and refine your photos effectively, making post-processing straightforward for beginners and professionals alike․
8․3 Basic Editing Tips for Beginners
Start with cropping to frame your subject perfectly․ Adjust brightness and contrast for better exposure․ Use sharpening tools to enhance clarity․ Reduce noise in low-light images․ Correct white balance for accurate colors․ Experiment with Canon’s Digital Photo Professional for non-destructive edits․ Save multiple versions to compare adjustments․ Keep edits subtle for natural results․ Practice regularly to refine your skills and enhance your photos effectively․

Maintenance and Troubleshooting
Regularly clean the camera and lens to prevent damage․ Update firmware for optimal performance․ Store equipment in a dry, cool place to avoid moisture damage․ Always handle the camera with care to ensure longevity and functionality․ Address issues promptly to maintain image quality and prevent further complications․ Proper maintenance ensures reliable operation․
9․1 Cleaning the Sensor and Lens
Clean the sensor and lens regularly to maintain image quality․ Use a soft-bristle brush to remove loose debris․ For stubborn spots, dampen a microfiber cloth with cleaning solution, but avoid touching the sensor with bare hands․ Use compressed air cautiously to avoid pushing debris deeper․ Clean in a dry, stable environment to prevent moisture damage․ Avoid using household cleaners, as they may damage coatings․ For internal smudges, use the camera’s self-cleaning mode if available․
9․2 Formatting Memory Cards
Formatting memory cards is essential for optimal performance․ Always back up your data before formatting, as it erases all content․ Use the camera’s menu system to format: go to the wrench/tools menu, select Format, and confirm․ Formatting ensures the card is properly initialized for the camera, preventing errors and maintaining compatibility․ Format cards regularly, especially if issues arise, and avoid formatting on a computer for best results․ Always complete the process without interruption for card integrity․
9․3 Common Issues and Solutions
Common issues with the Canon Rebel T3i include blurry images, camera not turning on, or memory card errors․ For blurry photos, ensure autofocus is enabled and clean the lens․ If the camera won’t power on, check the battery or power button․ For memory card errors, format the card in the camera or try a different card․ Refer to the user manual for specific error codes and troubleshooting steps to resolve issues effectively․
Accessories and Additional Gear
To enhance your Canon Rebel T3i experience, consider additional gear like memory cards, extra batteries, and camera bags․ These accessories help streamline your workflow and protect your equipment, ensuring you’re always ready to capture great shots․
10․1 Recommended Lenses for the T3i
The Canon Rebel T3i is compatible with EF-S lenses, offering versatility for various photography styles․ A standard EF-S 18-55mm lens is ideal for everyday shooting, while the EF 50mm f/1․8 is great for portraits․ For wide-angle shots, consider the EF-S 10-22mm, and for zoom capabilities, the EF 70-300mm is excellent․ Third-party lenses like Sigma or Tamron also provide affordable alternatives․ Choose lenses that match your photography needs and budget for enhanced creativity and image quality․
10․2 External Flash and Lighting Accessories
An external flash like the Canon Speedlite 430EX III enhances lighting control, reducing harsh shadows․ It offers bounce and swivel functions for versatile illumination․ Consider third-party options like Yongnuo for budget-friendly alternatives․ Additional lighting accessories, such as diffusers or reflectors, can improve light quality․ These tools expand your creative possibilities and ensure well-lit photos in various conditions, making them essential for professional and amateur photographers alike․
10․3 Tripods and Stabilization Equipment
A sturdy tripod is essential for sharp photos in low light or with slow shutter speeds․ Look for one with adjustable height and a smooth, durable head․ Monopods are ideal for mobility, while handheld gimbals stabilize video recording․ For added control, consider neutral density (ND) filters to manage light exposure․ These tools enhance stability and versatility, ensuring crisp results in challenging conditions․

Online Resources and Communities
The Canon Rebel T3i manual directs users to online forums, Canon’s official website, and YouTube channels for tutorials, firmware updates, and community support․
11․1 Canon’s Official Support and Manuals
Canon provides extensive official support for the Rebel T3i, including downloadable manuals, firmware updates, and troubleshooting guides on their website․ Users can access detailed instructions, repair services, and customer support through Canon’s official portal․ The manual is available in multiple languages and formats, ensuring easy accessibility for global users․ Regularly updated resources help users stay informed about camera functionality and maintenance․
11․2 Online Forums and User Communities
Online forums and user communities are invaluable for Canon Rebel T3i users seeking advice, tips, and shared experiences․ Platforms like Reddit, Facebook groups, and photography forums host active discussions․ Users can ask questions, share work, and learn from experienced photographers․ These communities often provide troubleshooting solutions, creative ideas, and inspiration, fostering a supportive environment for both beginners and advanced shooters to grow their skills and stay updated on photography trends․
11․3 Recommended Tutorials and Guides
For mastering the Canon Rebel T3i, numerous tutorials and guides are available online․ YouTube channels like Canon’s official page and independent photographers offer video tutorials․ Websites such as Udemy and Skillshare provide detailed courses․ Additionally, downloadable PDF guides and blogs specialize in T3i-specific tips․ These resources cover everything from basic operations to advanced techniques, ensuring users can enhance their photography skills effectively and efficiently․
Leave a Reply